Category: News

Why the VMware vSphere TPS vulnerability is a big deal

Escape-Lane

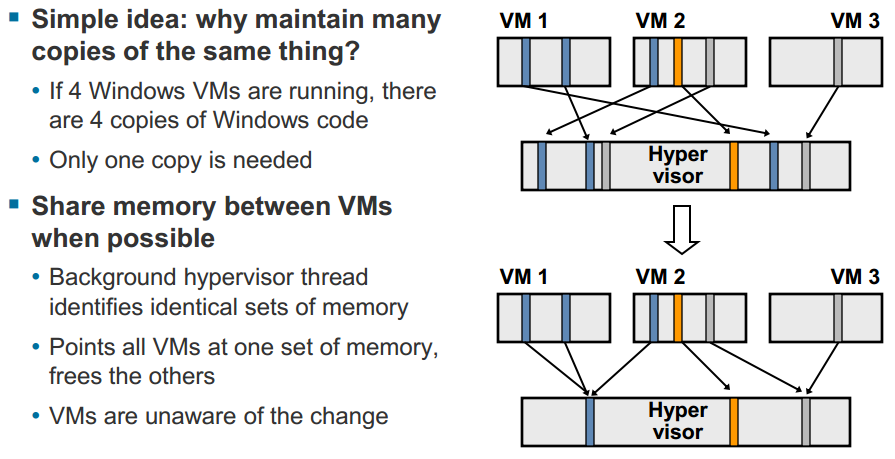
VMware recently acknowledged a vulnerability with their Transparent Page Sharing (TPS) feature that could potentially allow VM’s to access memory pages of other VMs running on a host. TPS is a host process that leverages the Virtual Machine Monitor (VMM) component of the VMkernel to scan physical host memory to identify redundant VM memory pages. The benefits of TPS are that it allows a host to reduce physical memory usage so you can squeeze more VMs onto a host as memory is often one of the most constrained resources on a host. TPS is basically the equivalent of storage de-duplication for RAM and works at the 4KB block level. You can read a full description on how it works in this classic VI3 memory white paper that refers to it as “Memory Sharing” or this more recent vSphere 5 white paper on memory management. Here’s a brief description of it and a slide on how it works:
[important]When multiple virtual machines are running, some of them may have identical sets of memory content. This presents opportunities for sharing memory across virtual machines (as well as sharing within a single virtual machine). For example, several virtual machines may be running the same guest operating system, have the same applications, or contain the same user data. With page sharing, the hypervisor can reclaim the redundant copies and keep only one copy, which is shared by multiple virtual machines in the host physical memory. As a result, the total virtual machine host memory consumption is reduced and a higher level of memory overcommitment is possible.[/important]

TPS2

It’s important to note that the TPS feature is nothing new to vSphere having been first introduced with the VI3 release back in 2006, but apparently someone has now finally gotten around to try and successfully exploit it. Why is this a big deal? Because a virtualized architecture demands VM isolation, this is the most important security requirement for virtualization. Each VM guest running on a host must not be allowed in any way to access another VM guest. They must be kept in separate locked rooms with only the hypervisor possessing the keys to access all of them.

To illustrate this let’s use a real world scenario, imagine if you checked into a hotel, you expect privacy and isolation and to not have any other guests be able to come into your room. However your room has an adjoining shared door with another room but neither guest could get through it, only the hotel management can control the door. But somehow a guest has figured out a way to to open that door and get into your room and invade your privacy, that’s a pretty big deal wouldn’t you say.

VMware appears to be down-playing it as it obviously exposes a chink in their virtual armor, they have issued a KB article describing the vulnerability and giving guidance on how customers can disable TPS on their hosts. VMware doesn’t name the specific source that found the vulnerability in the KB article, they simply refer to it as “an academic paper”. The academic paper is entitled “Wait a minute! A fast, Cross-VM attack on AES” and was written by a group of individuals from Worcester Polytechnic Institute in 2014. It was funded by a National Science Foundation grant and it’s a pretty technical, head-spinning read with a lot of mathematical formulas. It’s worth taking a look at though as parts of it are more easily consumable and describe the attack scenarios and results. The overview of the paper is described as:

[important]In this work, we show a novel cache-based side-channel attack on AES that—by employing the Flush+Reload technique—enables, for the first time, a practical full key recovery attack across virtual machine boundaries in a realistic cloud-like server setting. The attack takes advantage of deduplication mechanism called the Transparent Page Sharing which is employed by VMware virtualization engine and is the focus of this work. The attack works well across cores, i.e. it works well in a high-end server with multiple cores scenario that is commonly found in cloud systems. The attack is, compared to [13], minimally invasive, significantly reducing requirements on the adversary: memory accesses are minimal and the accesses do not need to interrupt the victim process’ execution. This also means that the attack is hardly detectable by the victim. Last but not least, the attack is lightning fast: we show that, when running in a realistic scenario where an encryption server is attacked, the whole key is recovered in less than 10 seconds in non-virtualized setting (i.e. using a spy process) even across cores, and in less than a minute in virtualized setting across VM boundaries.[/important]

When I was going through the paper at the end of the paper in the references section one thing I noticed was that the authors of the paper had previously written a paper earlier in 2014 entitled “Fine grain Cross-VM Attacks on Xen and VMware are possible!“. So it appears based on that they worked to apply the theoretical research from that paper into a real-life attack which succeeded and prompted the 2nd paper to be written.

It’s important to note that this is not an easily exploitable vulnerability and the risk is super low so most environments should not really be impacted by it. VMware is being overly cautious though and will disable the feature by default in all upcoming releases of vSphere which includes:

  • ESXi 5.5 Update release – Q1 2015
  • ESXi 5.1 Update release – Q4 2014
  • ESXi 5.0 Update release – Q1 2015
  • The next major version of ESXi

In addition they will be issuing patches before that to address it sooner rather than later as follows:

  • ESXi 5.5 Patch 3
  • ESXi 5.1 patch planned for Q4, 2014
  • ESXi 5.0 patch planned for Q4, 2014

All versions of vSphere back to VI3 are vulnerable to the exploit but VMware is only patching the 5.x versions of vSphere as the 4.x versions are no longer officially supported as of May 2014. Note these patches only disable TPS which is currently enable by default, they do nothing to fix the vulnerability, it will most likely take VMware some time to figure out how to make TPS work in a way that cannot be exploited. So if you disable TPS on your own you don’t really need the patch. VMware states in the KB article that “Administrators may revert to the previous behavior if they so wish” so it sounds like they are not too worried about it.

The benefits that TPS provides will vary in each environment depending on VM workloads so if you are really paranoid about security you will probably want to disable it. You can view the effectiveness of TPS in vCenter by looking at the “shared” and “sharedcommon” memory counters to see how much you benefit from it. You can disable TPS in your current environment by changing advanced settings on each host as described in the KB article, updating the setting is pretty simple but having it take effect is tedious work:

  1. Log in to ESX\ESXi or vCenter Server using the vSphere Client.
  2. If connected to vCenter Server, select the relevant ESX\ESXi host.
  3. In the Configuration tab, click Advanced Settings under the software section.
  4. In the Advanced Settings window, click Mem.
  5. Look for Mem.ShareScanGHz and set the value to 0.
  6. Click OK.
  7. Perform one of the following to make the TPS changes effective immediately:
    1. Migrate all the virtual machines to other host in cluster and back to original host.
    2. Shutdown and power-on the virtual machines.

While the impact and exposure may be minimal with this, the fact that someone has finally cracked those solid walls that have stood between VMs is a big deal. I’ve written about it previously in my post on Escaping the Cave, VMware officially describes this as “inter-process side channel leakage” and mentions this in the KB article:

[important]Side channel attacks that exploit information leakage from resources shared between processes running on a common processor is an area of research that has been explored for several years. Although largely theoretical, techniques are continuously improving as researchers build on each other’s work. Although this is not a problem unique to VMware technology, VMware does work with the research community to ensure that the issues are fully understood and to implement mitigation into our products when appropriate[/important]

Note they mention these types of vulnerabilities have been “explored” for years, meaning lots of people have been looking for a way to penetrate those walls as this is the holy grail type of hack of a virtual environment. Imagine if someone compromised a less critical VM through one of the many thousands of OS and application vulnerabilities that exist. At least the damage and exposure is contained within that one VM, but if some one could somehow use that compromised VM as a launchpad for attacking other VMs on a host that’s a real big deal. The fact that most of these types of vulnerabilities have been theoretical up until now really exposes VMware and their security foundation.

Overall vSphere is a very secure platform and has stood the test of time without any major issues which is a testament to how seriously they take security in vSphere. VMware will no doubt learn from this one and work to improve the security in vSphere to make it even better. However the circumstances of this one resulted from them trying to be more efficient with hypervisor resources by mixing VM data together. They will definitely need to be careful going forward as they continually look for new ways to optimize vSphere so they do it in a secure manner and do not risk exposure between VMs.

If you want to find out more about memory management in vSphere check out some of these links:

Share This:

So you have a virtualization blog, what are you doing to back it up?

Backup-790x461

Have you ever had that awful sick to your stomach, oh shit feeling when you just realized you lost a lot of important data whether it be photos, documents or other important stuff that can’t easily be replaced? It sucks doesn’t it, usually it takes just one instance like that to inspire us to start taking backups seriously. Unfortunately though it won’t bring back what you lost. Backups are one of those things that many people don’t think about especially when they store data on a location that is hosted on the internet.

There are a great many people that are blogging about virtualization these days and most of them are using WordPress as their platform of choice to do it. WordPress is an ideal platform for blogging but all that hard work you put into blogging could be wiped out if you don’t properly backup your WordPress site.

But doesn’t my hosting provider backup my site?

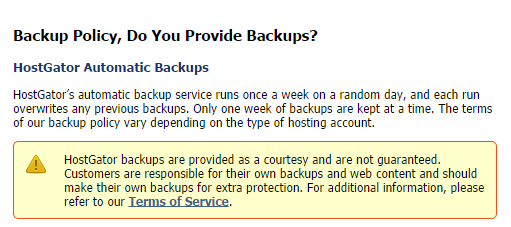
You should never trust that your hosting provider is backing up your website, many of them do not backup your content and if they do they probably do not guarantee them. Some hosting providers will offer a backup option as a paid add-on service. In addition they usually are not backing up your WordPress MySQL database which contains much of your valuable content. Take a look at this notice from my hosting provider, I think you’ll find the policy is similar with whatever provider you use, if you don’t know check with them.

Backup-1

How often should you backup your site?

Depending on how often you blog you should backup your WordPress instance at least once a month. If you are blogging several times a week you should probably do it daily or weekly. You should also do a backup before you upgrade WordPress to a newer version or update your plug-ins. Just like you do in the data center you should also plan on preserving older backups for as long as possible as often you may have something corrupted or malicious content that has been that way for a while that you need to go back a while to find a clean copy.

What should you backup?

With WordPress there are two main sets of data that you need to back up to ensure all your content is backed up and you can easily recover if needed, your WordPress files and your WordPress database. When you install WordPress on your website there are hundreds of files that get copied to specific directories that contain the complete WordPress web application. A new install of WordPress is only about 16MB in size with around 1,100 files but as you add content that will grow. Your WordPress database is typically hosted on a MySQL database that is installed and managed by your hosting provider. The WordPress database has many tables that store configuration and content for your WordPress website.

How do I back it up?

So now we know what needs to be backed up, how do we actually do it? There are several ways that you can backup WordPress:

  1. Manually by copying all your files to a PC using FTP and then doing a SQL export of your WordPress MySQL database and copying that to your local PC as well.
  2. Automatically by using some type of PHP script that can run scheduled on your hosting provider server using a scheduling tool like cron.
  3. Automatically using a WordPress plug-in designed to backup WordPress.
  4. Some hosting providers will do it if you pay for a add-on backup service.

Doing a manual backup

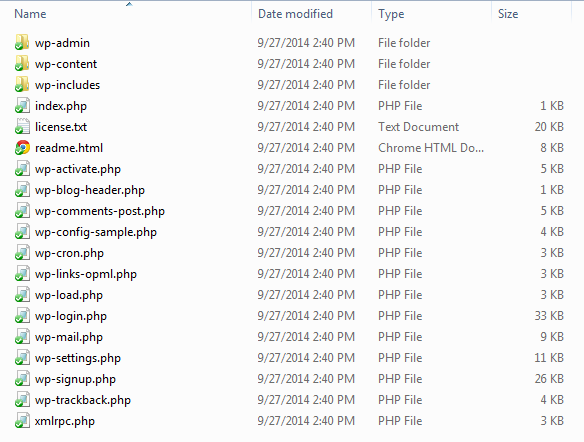
This method is OK for ad-hoc backups but it can be tedious to do on a frequent basis and it can easily slip your mind. I used this method for years, I did it nowhere near as often as I should of and I got lucky a few times were I almost lost a lot of data. To backup WordPress manually you will need to copy the all appropriate files and directories from the hosting provider web server to your local PC or even better to a cloud storage platform like Dropbox. Below are the files and directories that are come with a new install of WordPress.

Move2

The easiest way to move the files is to use an FTP application to copy them from your old server to your local PC and then to your new server. It’s also a good idea to periodically do this to backup WordPress. If you need a FTP client, check out FileZilla which is a free open source application. You may need to setup a FTP username/password on your hosting site before you can connect to it. Create a new site in FileZilla and give it a name (i.e. mywebsite-old), use the IP address or DNS name of your website and then enter in your login credentials. Once you connect to your web server you’ll see the directory listing of the contents, what you see will usually vary by hosting providers, some providers partition you off so you don’t see much of the web server files.

You may not need all the files you see to backup WordPress but its best to copy everything to a sub-directory on your PC so you do have a full backup just in case. In the figure above you can see the 3 WordPress directories that you need to copy for sure along with all the files that start with “wp” in the root directory. I’ve manually copied things to my site in the past (i.e. images) which I copy also. Other files that are part of the hosting platform you typically don’t need to bring over but it doesn’t hurt to copy them any way. Once you’ve copied everything to your PC it’s time to move on to the next step, backing up your MySQL database.

Your WordPress database is typically hosted on a MySQL database that is installed and managed by your hosting provider. The WordPress database has many tables that store configuration and content for your WordPress website. You can find a complete description of the database tables here. Log into your hosting provider control panel for your website and you should see a link for database management via phpMyAdmin which is a free software tool that is written in PHP that is used to administer MySQL over the Web. Once you launch phpMyAdmin you should be prompted for a username and password to connect to your database. You probably won’t know it or remember it but you can easily look it up by opening the wpconfig.php file that you copied to your PC as part of the backup in a text editor like Notepad and looking for the MySQL section which will contain your MySQL username/password.

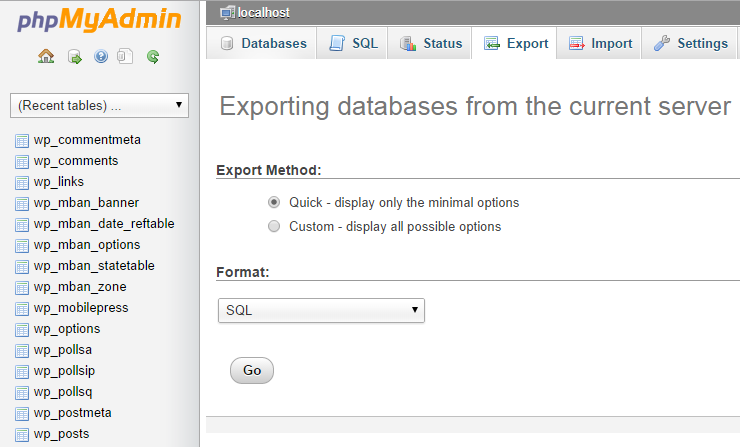
Note some hosting providers may require you to whitelist your IP address to do remote MySQL administration, if they do there should be a section in your hosting control panel to put in your IP address. Once you are logged into phpMyAdmin you want to Export your database, click the Export link. You may be prompted for a quick export where you don’t need to enter a lot of options which will work just fine, if you do get a selection screen you typically can just use the defaults and then just hit Go and it will ask you for a location for the file on your PC and then begin the Export. It shouldn’t take more than a few minutes. Here’s how the Export screen looks with my hosting provider:

Backup-2

Once you have completed this it will create a .SQL file on your local PC that you should save with the other WordPress files that you copied. You now have everything you need to restore WordPress if needed by copying all the files you backed up back to the server and Importing the .SQL file back into WordPress, see my other post on moving to a new hosting provider for more info on how to do that.

Also note some hosting providers like GoDaddy provide a link in their control panel to kick off a database backup so you don’t have to go into PHPMyAdmin. They dump the resulting .SQL file in a db backup directory on your website, just make sure you copy the file from there to your local PC.

Doing an automatic backup with a PHP script and cron

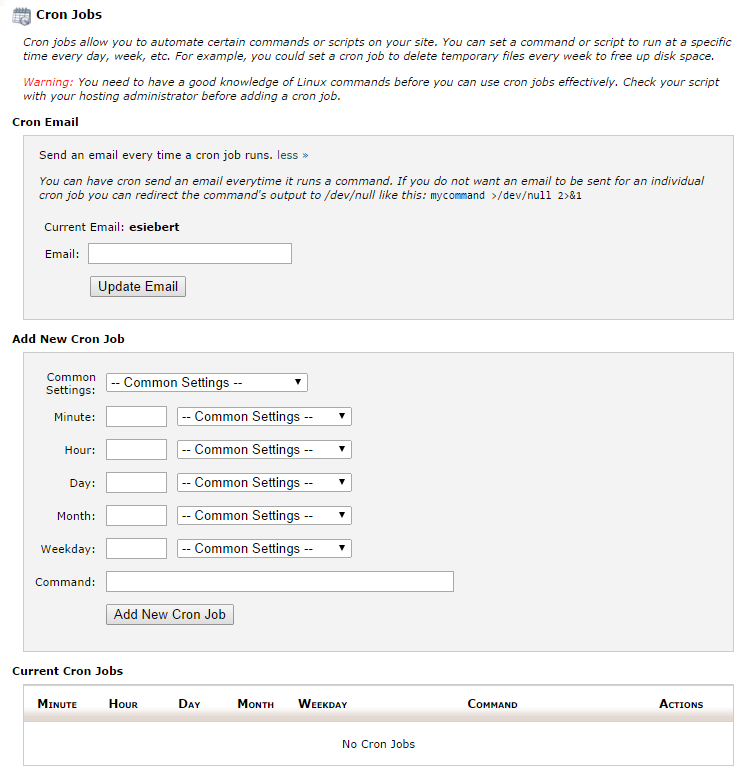
I’m not going to go into much detail on this method, it can be a bit technical to setup. There are some WordPress plug-ins available that will make this easier to setup. Your hosting provider control panel should have a section to setup and manage cron jobs like below:

Backup-3

You then need to configure the scheduling and action for the cron job for the cron job to perform like below:

Backup-4

Again look for some WordPress plug-ins that support cron or a PHP script that is written to backup WordPress MySQL databases. If you are feeling adventurous you could also write your own PHP script. Here’s one I found by searching the internet. Some scripts may only backup the database so make sure you know what the script is doing and where it is storing your backups.

Doing an automatic backup with WordPress plug-in

This is probably the easiest and most convenient way to backup your WordPress site. There are many plug-ins available that will automate the backup of both your WordPress files and MySQL database so you don’t have to do anything but install the plug-in and configure it. You can search through the WordPress plug-in directory and you’ll see many of them. The one I ended up using which had 4.8 out of 5 stars and is free but has some paid add-on’s is UpDraftPlus Backup & Restoration. You can go to their add-on page which contains a big list of add-on’s and pricing for each that expand the flexibility, functionality and backup targets supported. Another popular WordPress backup plug-in is BackWPup.

You can backup your site just fine with the free version but it only puts the backup files on your hosting web server. If you want to use other backup destinations like Dropbox, Amazon E3, Rackspace, Google Drive and more it will cost you about $10 for each. If you do backup to your website only just remember to copy those files off periodically to somewhere safe.

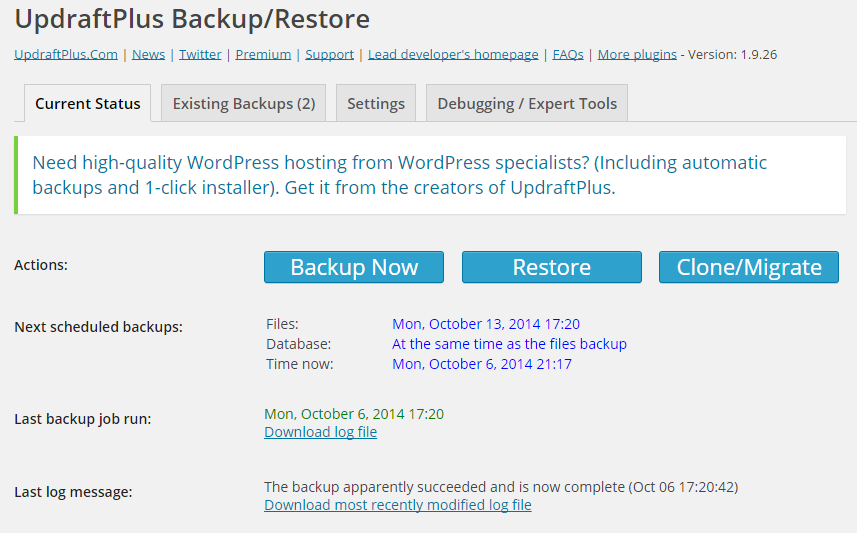
Install UpDraftPlus like you would any other WordPress plug-in, once activated go into Settings, UpDraftPlus Backups in WordPress to setup your backup jobs and you will be at the main screen:

Backup-5

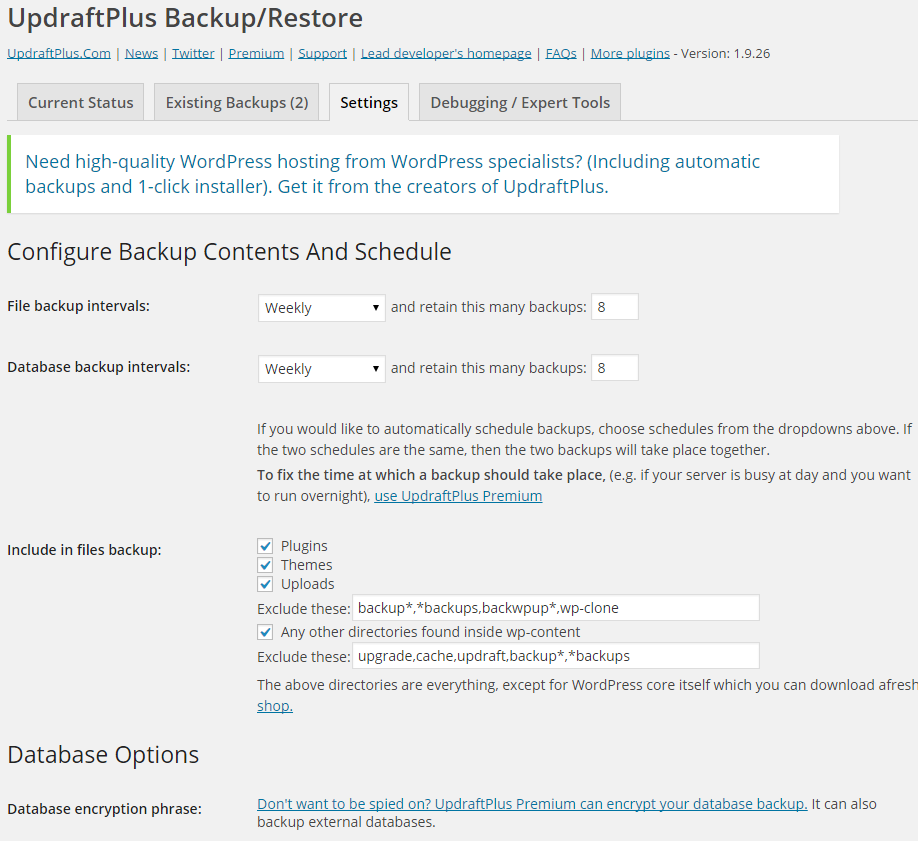
Here you can see your backup status and quick actions for backing up and restoring. It’s best to click on the Settings tab first to configure backup schedules and retention. Since most hosting providers now provide unlimited space don’t be afraid to retain a lot of backups.


Backup-6

You can also specify what files to backup, database encryption if you are really paranoid, reporting, remote storage options and other advanced settings. Note by default with the free version it will not backup your core WordPress files (i.e. wp-admin) but unless you customize yours you won’t have to worry about those as you can easily download those again if needed. All the files specific to your WordPress site are in the Themes and Plugins directories.

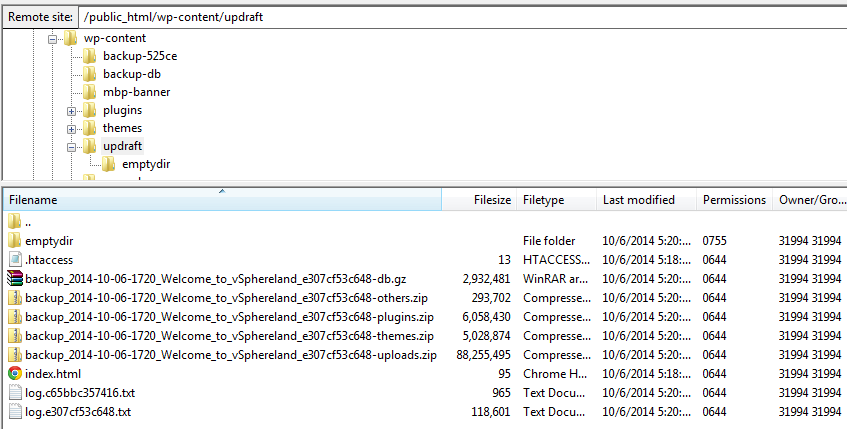
Once the backup runs you can look at the log files to see everything that occurred during the backup, it’s not something you’ll need to do regularly but I looked as I was curious. If you are using the free version which puts the backups into your WordPress directory you’ll see a new sub-directory under wp-content called updraft that contains your backup files all zipped up, make sure you backup these backup files somewhere else!

Backup-7

What about Backup as a Service?

If you prefer not to deal with your backups at all you can outsource them to a company that provides backup services for WordPress. Note both of these companies below backup both your WordPress files and database.

blogVault

One such company that does this is blogVault. Their Basic plan starts at $9/month for backing up a single site and retain 30 days of backups. If you have more than one site you they have a Plus plan for $19/month that will backup 3 sites. It works by installing their WordPress plug-in on your site and then their server automatically contacts the plugin everyday to backup new changes to your site.

bb-logo

Another company that provides WordPress backup services is Backup Buddy. Their Blogger plan rate is $80/year for backing up 2 sites with 1GB of backup space available. Presumably with that much space available you could store more than 60 days of backups with them. They also have a Freelancer plan available for $100/year for up to 10 sites with 1GB of backup space. Again it works by installing their WordPress plug-in on your site and then configuring it, they have a video that demonstrates this process.

Summary

And that’s all there is to it, pick the service/method/plug-in that works best for you. For me I’ve setup UpDraftPlus and will also periodically do manual backups as well. Regardless of how you do it the important thing is that you are backing up your WordPress site which contains all your hard work that you do not want to ever take the chance of losing.

Share This:

10 Ways to Ruin a Presentation

ruined-building-hurricane-katrina

I’m always looking to improve my public persona and a few months ago I wrote a post on how to gain confidence to be an effective public speaker. Recently I came across a great paper from Harvard Business Review entitled “How to Give a Killer Presentation” that is a great read. Within that there was a sidebar with great tips focused on surefire ways to ruin a presentation that I thought I’d pass along.

  1. Take a really long time to explain what your talk is about.

  2. Speak slowly and dramatically. Why talk when you can orate?

  3. Make sure you subtly let everyone know how important you are.

  4. Refer to your book repeatedly. Even better, quote yourself from it.

  5. Cram your slides with numerous text bullet points and multiple fonts.

  6. Use lots of unexplained technical jargon to make yourself sound smart.

  7. Speak at great length about the history of your organization and its glorious achievements.

  8. Don’t bother rehearsing to check how long your talk is running.

  9. Sound as if you’re reciting your talk from memory.

  10. Never, ever make eye contact with anyone in the audience.


Remember these are all ways to ruin your presentation, not improve it. So if you are guilty of any of these maybe it’s time to stop if you want to become a better speaker.

Share This:

Get your free virtualization tools right here!

SN-TNFREEBEER-small

Nothing beats free and many companies offer scaled down versions of their full products or purpose built mini tools as free tools. SolarWinds is one company which specializes in all sorts of tools that has many different free tools available for just about everything in the data center.

VMware has been developing free tools that they call Flings for several years now. Flings are lightweight, specific use tools developed by VMware Labs that often make up for some functionality that might be missing in their products. These tools often make their way into VMware products later on.

Whatever the motivation that a vendor has for creating a free tool the end result is tools that don’t cost you anything that can make your virtual life much easier.

I just updated my free virtualization tools section with many new tools from companies like SolarWinds, VMTurbo, Unitrends and VMware Labs. So head on over there and check them out and if there is a tool missing that you want people to know about just let me know.

Share This:

What to know more about VMware VVols?

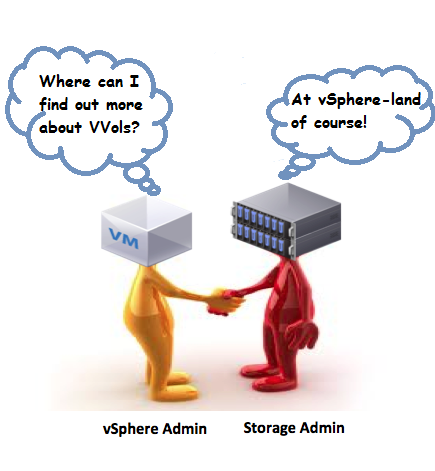
Of course you do, well I started a VVols link collection on them so you can find out more about them in preparation for their upcoming release in the next version of vSphere. There is not a lot of content out there right now but bookmark the link collection page as the links will continue to grow as more information is published. Just click on the image below or the VVols links in the right sidebar to go there.


VVols-new2


Share This:

How to move your WordPress site from one hosting provider to another – Part 2

In part 1 we covered everything you need to do to prepare and backup your WordPress site before migrating it to another hosting provider. Now we’ll continue with setting up the site on the new hosting provider and copying all your data from your old hosting provider over.

1. Setup your new hosting account

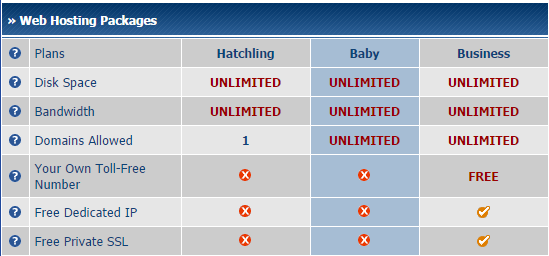
I moved my site from GoDaddy to HostGator which had decent pricing and features. I went with the “Baby”  plan which is their middle plan and features unlimited bandwidth, disk space and domains for around $8/month. Below is a basic comparison of their plans, you can see a full comparison here. Move8 Shortly after you sign-up you should receive any email with the details to set it up.

2. Setup FTP and copy your files to the new web server

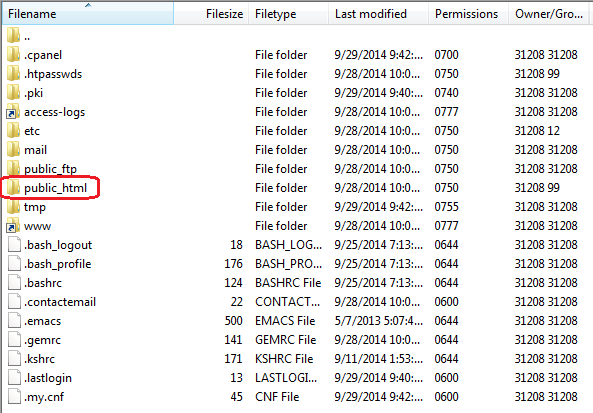
Next I logged in to the website control panel. FTP is automatically setup to the default account name that you choose when you setup the initial website, you can modify your FTP settings in the control panel though. There are also FTP client config files that you can use to easily setup a FTP client entry so you can connect to your website. Move9 Once I connected with FileZilla, my home directory on the web server shows several different sub-directories, you want to go to the public_html directory which is the default directory for website content. Note on other hosting providers this may be different and you might only see your default web directory and not other sub-directories.

Move10-edit

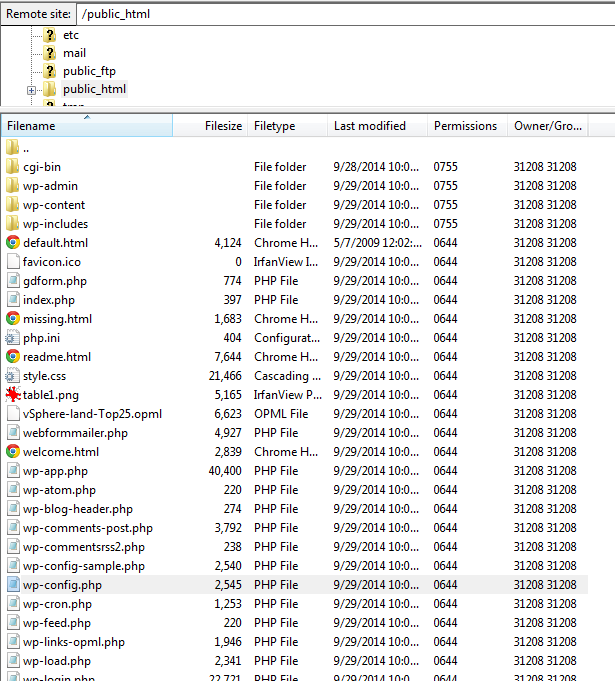
Next you need to copy all of the files and directories (wp-admin, wp-content, wp-includes, etc.) that you backed up from your website on your old hosting provider into the public_html directory. Now that all your WordPress files are there we need to copy the database.

Move21

3. Creating the database and importing the tables

Now we have to create a MySQL database and import the tables that we backed up into it. The first step for me was to add my PC IP address to the Remote MySQL administration white list so I can run phpMyAdmin and perform database operations. With HostGator the default is to block everyone except IP addresses that are added, you may not have to do this with your hosting provider. To find out your external facing IP address just Google “What is my IP address”. To set this up I for go into Remote MySQL in the hosting control panel.

Move11

And then add my IP address to the access list.

Move12

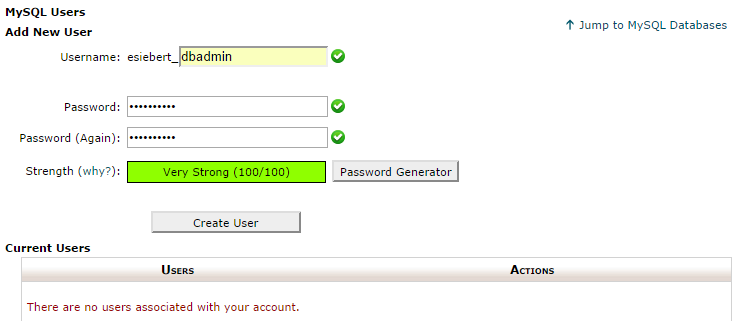
Now we want to setup a database user for WordPress to use, you can use the original username/password that is specified in your wpconfig.php file or specify a different one. If you do use something different you must update your wpconfig.php on the web server with the new credentials. To configure a MySQL user with HostGator you click on MySQL Databases in the hosting control panel and then go to the Add New User section and put in a username/password.

Move13

Next I’m going to manually create the database, there is a Create Database statement in the SQL script that is used to import your old database but I’d have to edit that to fit HostGator’s naming convention, so I’ll just manually create it and give it a more descriptive name. To do this go to MySQL Databases in the hosting control panel and then go to the Create New Database section and put in a database name.

Move15

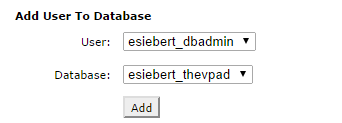
Next you want to give the user you created access to the new database you created, to do this go to the Add User to Database section and click Add

Move17


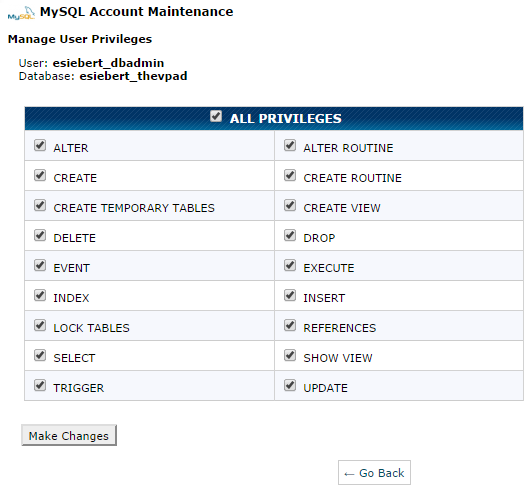
At the next screen give the user All Privileges to the database.

Move16

Now we have our user and database setup, time to go to phpMyAdmin and import the .SQL file that we created when we exported our database from our original hosting provider. Before we do that we have to comment out the CREATE statement at the top of the .SQL file as we have already created our database. Edit the .SQL file on your PC using a good text editor that understands SQL like Notepad++. I changed this section:

[important]–
— Database: `pla1002002410429`

CREATE DATABASE `pla1002002410429` DEFAULT CHARACTER SET utf8 COLLATE utf8_general_ci;
USE `pla1002002410429`;[/important]

to this:

[important]– Database: `pla1002002410429`

— CREATE DATABASE `pla1002002410429` DEFAULT CHARACTER SET utf8 COLLATE utf8_general_ci;
USE `esiebert_thevpad`;[/important]

I put a — (2 dashes) in front of the CREATE statement to comment it out so it will not execute and then changed the database name in the USE statement to match the database I created. Note that HostGator puts the hosting account username “esiebert” in front of the database name so I couldn’t use just the database short name “thevpad”.

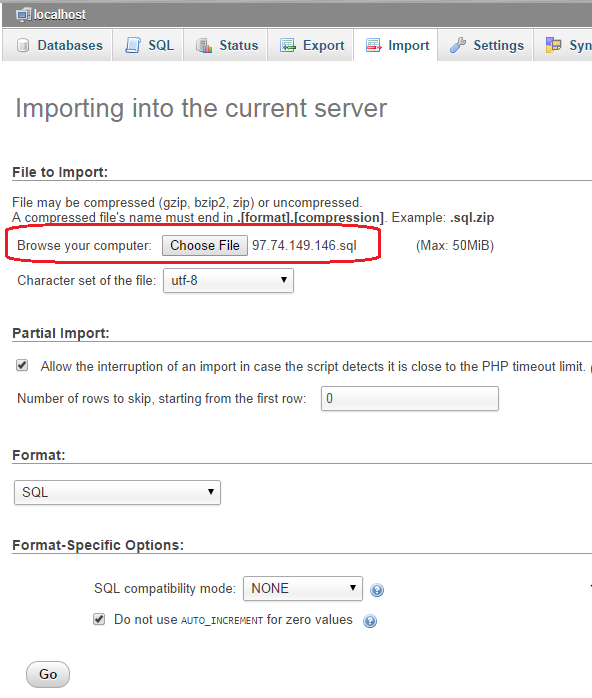
Now it’s time to import the .SQL and create our tables and fill them with data. Go into phpMyAmin and click on the Import tab and then select the .SQL file on your local PC and then click Go.

Move14-edit

It should execute and start importing, depending on how big your website is it could take a few seconds or a few minutes. Once it is done you should see a confirmation message.

Move18

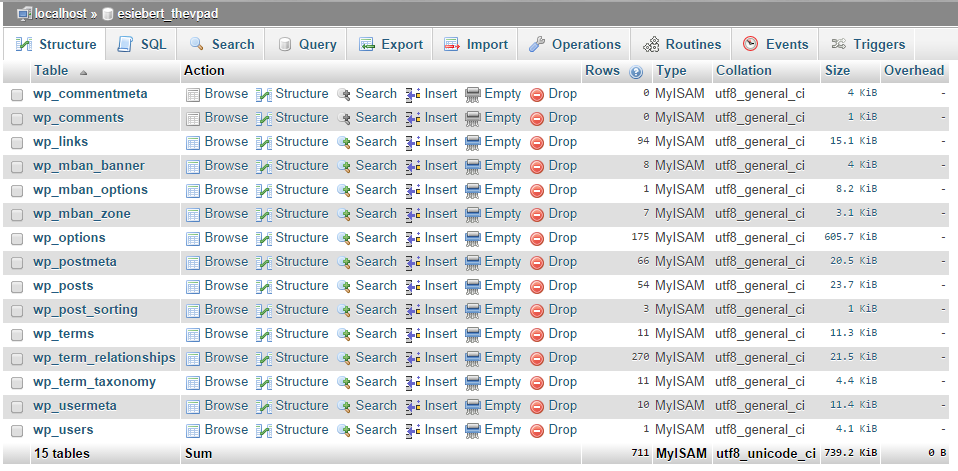
You can verify that your WordPress tables have been imported by clicking on the Database tab and the clicking on your database.

Move19

4. Final steps

Now that we have copied our WordPress files via FTP and our database via phpMyAdmin we have everything in place and there are just a few final steps left. The first is to update our wpconfig.php on the webserver to reflect our new database name and username/password. To do this open FileZilla, connect to the webserver, find your wpconfig.php and select View/Edit. Here is the section we need to edit:

[important]

// ** MySQL settings – You can get this info from your web host ** //
/** The name of the database for WordPress */
define(‘DB_NAME’, ‘pla1002002410429’);

/** MySQL database username */
define(‘DB_USER’, ‘pla1002002410429’);

/** MySQL database password */
define(‘DB_PASSWORD’, ‘Admin1234’);

/** MySQL hostname */
define(‘DB_HOST’, ‘pla1002002410429.db.5029023.hostedresource.com’);

[/important]

We want to change the database name, username, password and hostname like so, remember with HostGator you need the account name in front of everything :

[important]

// ** MySQL settings – You can get this info from your web host ** //
/** The name of the database for WordPress */
define(‘DB_NAME’, ‘esiebert_thevpad’);

/** MySQL database username */
define(‘DB_USER’, ‘esiebert_dbadmin’);

/** MySQL database password */
define(‘DB_PASSWORD’, ‘Admin5678’);

/** MySQL hostname */
define(‘DB_HOST’, ‘localhost’);

[/important]

Next it’s time to fire up WordPress and see if it works, we haven’t cutover DNS yet to the IP address of the new hosting server. Before doing that I like to do a quick test to make sure the basic site works. You usually can’t just enter the IP address in a web browser to get to your site as shared hosting usually runs many websites on a single web server and requires a DNS name to direct incoming traffic to your specific website on the web server. I created a new A record in my DNS zone file something like thevpad.vsphere-land.com and pointed it to the IP address of the new hosting web server. Then I use that to test opening up files on the web server in a browser and then going to the WordPress admin page. Note doing this you will not be able to fully access your website on the new web server as anything you click on will re-direct to the old web server as the original DNS entry is hard coded in WordPress, but this will at least allow you to verify that WordPress is running OK.

Hooray it works:

Move20

Now that I know WordPress is up and running on the new web server and my data is all there it’s a simple matter of updating my main A records for my DNS domain to point to the new server. At this point you’re done, what I like to do after I make the DNS cutover is upgrade my WordPress version if its not up-to-date and plug-ins and make any other site changes (i.e. themes, settings, etc.). That way if something breaks from doing all that I can simply update DNS to go back to my old server if needed for an easy failback.

And that’s all there is to it. One of the reasons I documented all this is that I have 5 websites to move and I wanted to make sure I had all the steps documented. I got stuck a few times and had to research some things but once I fully understood the process it was fairly straight-forward. I hope this helped anyone else wanting to move their WordPress site to a new hosting provider.

Share This:

How to move your WordPress site from one hosting provider to another – Part 1

So you have a virtualization blog and for whatever reason you want to move it to a new hosting provider, where do you begin? I recently moved this site from GoDaddy to HostGator as I was fed up with GoDaddy for a number of reasons. I was initially a bit intimidated by the move as it didn’t seem all the straightforward and I didn’t want anything to break. My main concerns were preserving the version of WordPress I was on and all my plug-ins and successfully moving the database. After doing a bunch of research and finding out all I could about how to move everything correctly I found the whole process to be fairly easy and pain-free. I thought I would document what was involved to make the move and the necessary steps in case anyone else has to go through it.

There are 3 main things that need to be moved when migrating a WordPress instance from one hosting provider to another:

  1. DNS records
  2. WordPress files
  3. WordPress database

1. Prepare your DNS entry for a quicker cutover

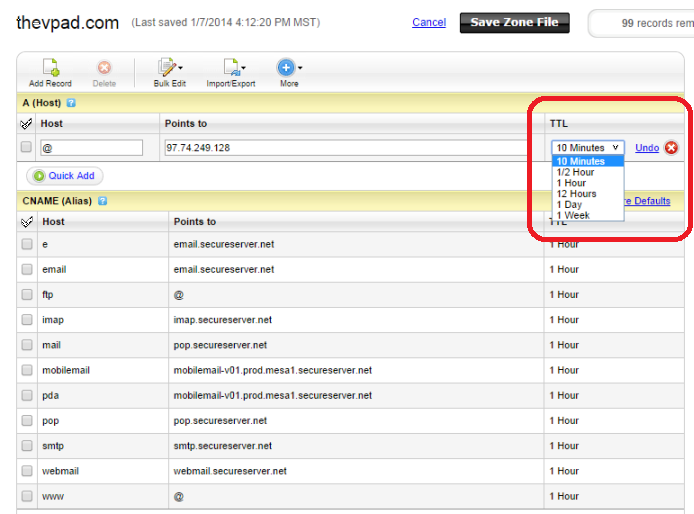
Updating DNS to the IP address of your new hosting server is probably the simplest part and also the last step in the process. However because DNS can take a while to propagate out across the internet, you’ll want to change the Time To Live (TTL) value for your website’s DNS entry at least a day before starting the migration. Doing this ensures that your cutover will be quicker as DNS records will be cached for a shorter amount of time and will be forced to lookup sooner and recognize the IP address change, also if you need to fail back to your old server for any reason that will go quicker as well. Go to your DNS control panel and modify your A record and any applicable CNAME records (i.e. www) to 1 hour or less.

Move1-smaller

2. Backup all your WordPress files

When you install WordPress on your website there are hundreds of files that get copied to specific directories that contain the complete WordPress web application. A new install of WordPress is only about 16MB in size with around 1,100 files but as you add content that will grow. Since we will be moving WordPress from one server to another we will need to copy the appropriate files and directories from the old server to the new server. If you for some reason want to ever install a fresh copy of WordPress you can find all of the versions in the WordPress release archive. Below are the files and directories that are come with a new install of WordPress.

Move2

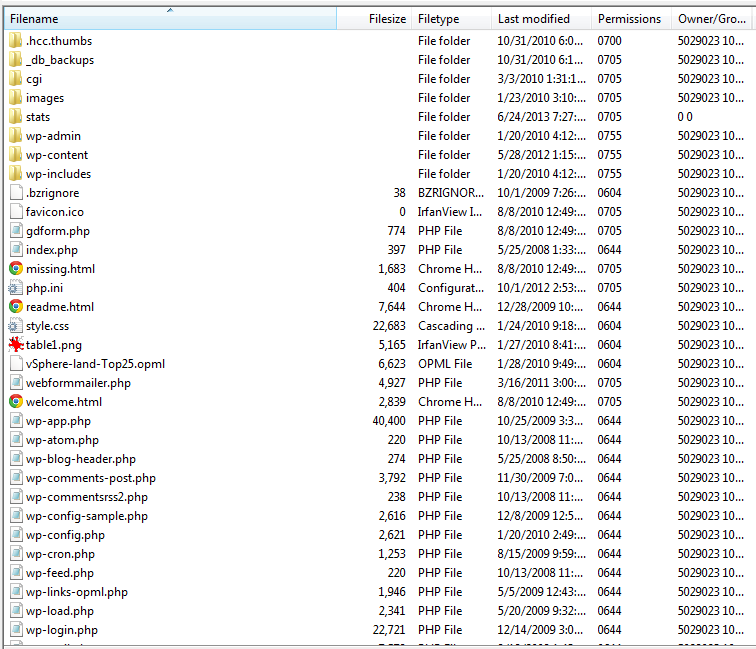
The easiest way to move the files is to use an FTP application to copy them from your old server to your local PC and then to your new server. It’s also a good idea to periodically do this to backup WordPress. If you need a FTP client, check out FileZilla which is a free open source application. You may need to setup a FTP username/password on your hosting site before you can connect to it. Create a new site in FileZilla and give it a name (i.e. mywebsite-old), use the IP address instead of a DNS name to avoid confusion during the cutover and then enter in your login credentials. Once you connect to your web server you’ll see the directory listing of the contents, what you see will usually vary by hosting providers, some providers partition you off so you don’t see much of the web server files. After connecting to my website on GoDaddy here is the content listing:

Move3

At this point it’s important to not make any changes to your old website, otherwise they will not be copied to your new websitesite. You may not need all the files you see but its best to copy everything to a subdirectory on your PC so you do have a full backup in case you miss anything that you might need later. In the figure above you can see the 3 WordPress directories that you need to copy for sure along with all the files that start with “wp” in the root directory. I’ve manually copied things to my site in the past (i.e. images) which is why you see some extra files and directories which I’ll copy also. Other files that are part of the hosting platform like “cgi”, “stats”, “webformmailer.php” and “_db_backups” I don’t need to bring over. Once you’ve copied everything to your PC it’s time to move on to the next step, copying your database.

3. Backup your database

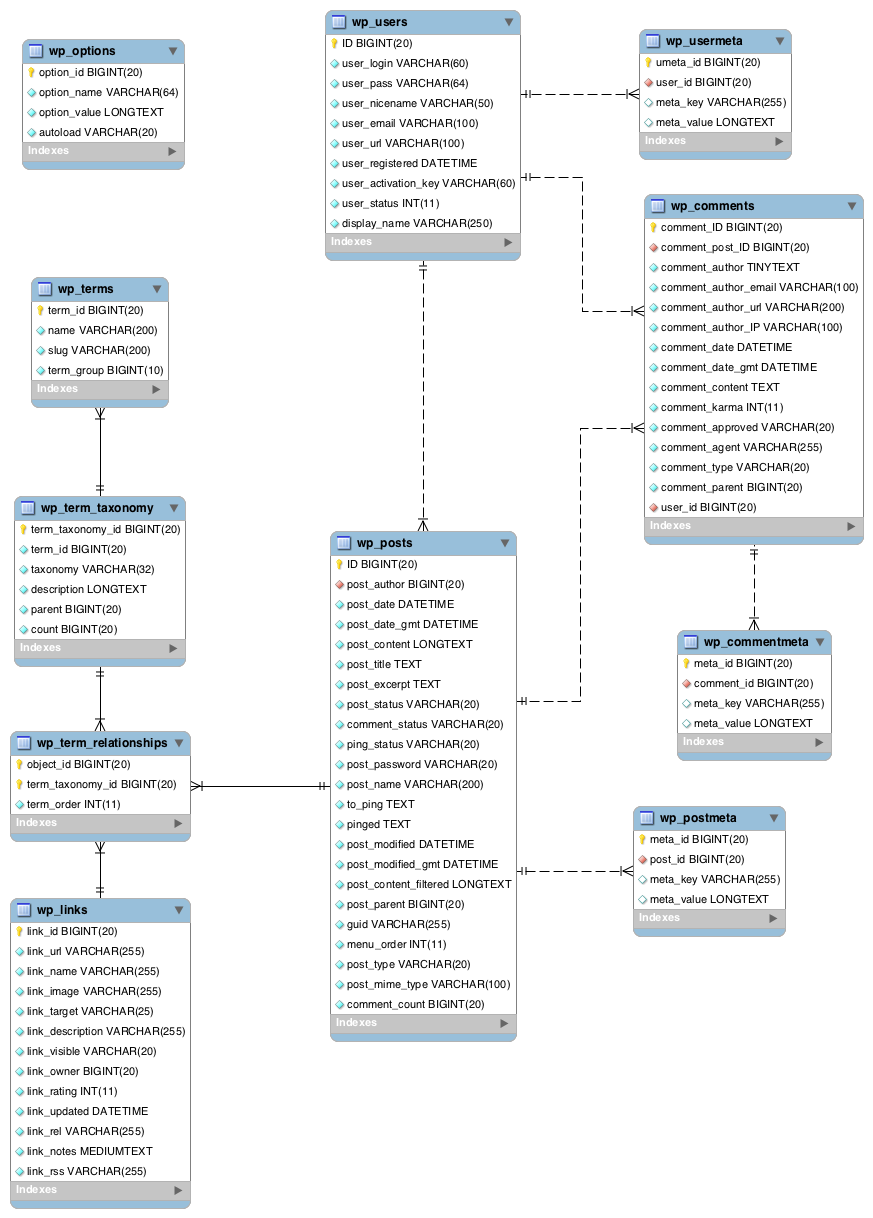
Your WordPress database is typically hosted on a MySQL database that is installed and managed by your hosting provider. The WordPress database has many tables that store configuration and content for your WordPress website. You can see what a typical WordPress database structure looks like below, you can find a complete description of the database tables here:

WP3.8-ERD

Most hosting providers provide database management tools so you can manage and perform database operations. Don’t be intimidated by this as what we are doing to back it up is fairly simple and you don’t need to be a DBA to do it. Log into your hosting provider control panel for your website and you should see a link for database management via phpMyAdmin which is a free software tool that is written in PHP that is used to administer MySQL over the Web. Here’s how you launch it on GoDaddy in your website control panel:

Move4Note the database name which is usually a mix of letter and numbers, launch phpMyAdmin and you should be prompted for a username and password to connect to your database.

Move5


You probably won’t know it or remember it but no worries as you can easily look it up by opening the wpconfig.php file that you copied to your PC as part of the backup in a text editor like Notepad and look for the MySQL section like below:

[important]// ** MySQL settings – You can get this info from your web host ** //
/** The name of the database for WordPress */
define(‘DB_NAME’, ‘pla1002002410429’);

/** MySQL database username */
define(‘DB_USER’, ‘pla1002002410429’);

/** MySQL database password */
define(‘DB_PASSWORD’, ‘Admin1234’);

/** MySQL hostname */
define(‘DB_HOST’, ‘pla1002002410429.db.5029023.hostedresource.com’); [/important]

Note my username was the same as the database name, now that you have the username and password you can login to phpMyAdmin with it. Note some hosting providers may require you to whitelist your IP address to do remote MySQL administration, if they do there should be a section in your hosting control panel to put in your IP address. Once you are logged into phpMyAdmin you want to Export your database, click the Export link as shown below:

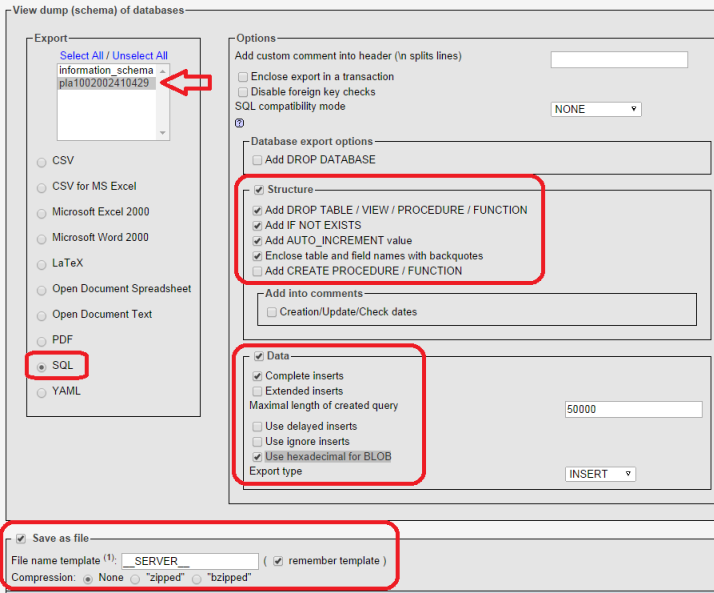
Move6-smaller

On the Export options screen do the following (note your options may be slightly different):

Export section

  • Select your database, you should only be selecting one, do not select all as you do not need others like information_schema
  • Make sure SQL format is selected

Options – Structure section

  • Make sure Structure is selected
  • Select Add DROP TABLE / VIEW / PROCEDURE / FUNCTION
  • Select Add IF NOT EXISTS
  • Select Add AUTO_INCREMENT value
  • Select Enclose table and field names with backquotes

Options – Data section

  • Make sure Data is selected
  • Complete inserts
  • Use hexadecimal for BLOB

Save as file section

  • Select Save as file
  • Select Compression to None

When you have done as this it should look similar to below, hit Go and it will ask you for a location for the file on your PC and then begin the Export. It shouldn’t take more than a few minutes.

Move7-smaller

Once you have completed this you have everything you need to move your WordPress site to a new hosting provider. Part 2 will cover how to copy your WordPress files to your new web server and import your database and get it all up and running.

Share This:

VMworld 2014 – The Review

Another year, another VMworld, this would be #7 for me and I wanted pass along my thoughts of this one.

Getting there

I arrived on Sunday afternoon, I just missed the earthquake which happened about 7 hours before my flight was leaving from Phoenix. When I read about the earthquake that morning I was a bit concerned thinking, a) did it damage anything that might impact the conference and b) I have to live in that recently seismically active area for 4 days where more aftershocks or “the big one” could occur. Thankfully the only damage around Moscone was limited to disrupting the sleep of hung over attendees who got in early. After arriving I checked into the hotel, went to Moscone to register and then down to the Solutions Exchange to help setup our booth and check in on things.

The hotel situation

Let’s take a moment and talk about hotels, the availability and rates are ridiculous in SF. You’re typically looking at $300-$500/night if you want to be fairly close to the Moscone and of course who wouldn’t want to be. I hate walking and especially in SF when you have to deal with all the buses, cable cars, crazy taxi drivers and street people that are everywhere, so being as close to Moscone is a priority for me. My usual little known hotel which is only a block away from Moscone and very cheap was sold out this year though. So I had to go to plan B which was the Hilton where we had a block of rooms but it was about 5 blocks away. When it comes to hotels at VMworld I don’t care about amenities or how nice things look, if it has a bed, bathroom and wifi that’s all I need as I’m usually only there about 7 hours just to sleep. In comparison this is one thing that is ideal about having conferences in Las Vegas, mega-hotels. I usually never have to leave the hotel as the conference is in the same building.

Sunday

Anyway Sunday was the opening of the Solutions Exchange, it was a real good crowd and I enjoyed talking to people and walking around checking out the many vendors. The Solutions Exchange area was well executed and probably the star of the show this year. I saw a lot of new vendors and it seemed a lot of the smaller vendors had a pretty big presence to take full advantage of the event as a place to shine and engage attendees. After the event shutdown I headed over to the VMunderground party which was in the Metreon this year which was a much more suitable venue for it given the large amount of people that attend it. It was very well planned and a great event so hats off to the group that makes it possible each year.

Monday

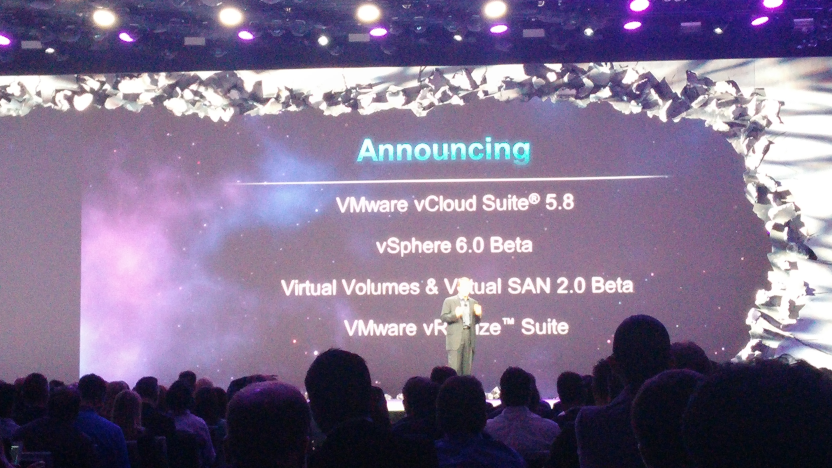
Monday was the general keynote session with Robin Matlock, Pat Gelsinger and Carl Eschenbach. The day 1 session is typically focused on strategy, vision and marketing but they also typically announce anything new as well. This year I found the keynote rather flat and boring, if it was on my DVR I probably would of fast-forwarded through the whole first half-hour. At the keynote they announced EVO, vCloud Suite 5.8, the vSphere 6.0 beta featuring VVols and VSAN 2.0 beta and vRealize. Let’s talk about those some more.

What’s new and exciting (or not)

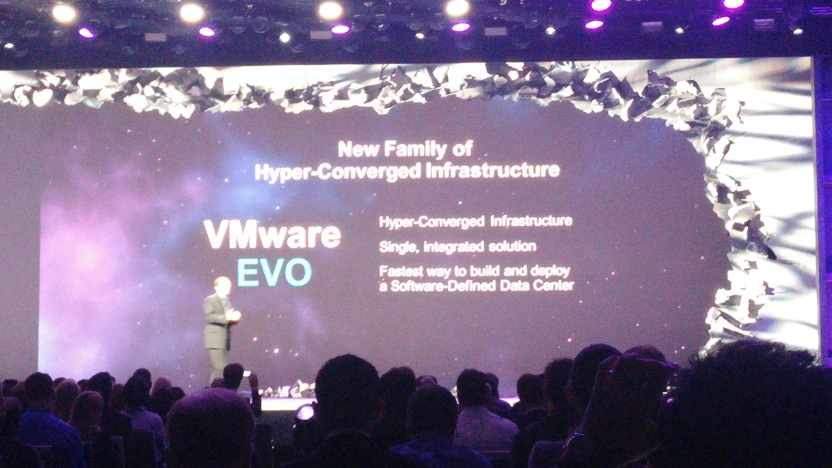
The rumors of a VMware hyper-converged platform have been floating around for a while with the program name MARVIN. EVO is the official launch name now and it comes in 2 flavors, EVO:Rail which is a single hyper-converged appliance and EVO:Rack which is a super-sized version which as the name implies is a bunch of EVO:Rail’s filling a whole rack. VMware stressed they were not going to get into the hardware business (not yet at least) and they would work closely with their partners to develop EVO solutions. We’ll have to wait and see how well that plays out and customer interest in EVO.

In product renaming news we have vCloud Hybrid Service (vCHS) transforming into vCloud Air <insert Apple/Mac joke here> and various automation and management products transforming into the vRealize Suite which consists of:

  • VMware vCloud Automation Center Advanced or Enterprise
  • VMware vCenter Operations Management Suite Advanced or Enterprise
  • VMware vCenter Log Insight
  • VMware IT Business Management Suite Standard Edition

VMware must have a whole department devoted to how they can continually rename their products to keep their customers confused. I kind of like the new vCloud Air name but it definitely sounds like an Apple product. The vRealize suite name is another story, to put it bluntly, it’s a pretty stupid sounding name. I get the definition of realize is “become fully aware of (something) as a fact; understand clearly” but to use it as a product suite name is dumb. If they are going to go that route why not vUnderstand or vComprehend instead. I’m sure they could of come up with a much cooler sounding name for it.

The vSphere 6.0 beta wasn’t really talked about much as it is still quite a ways out before it becomes available sometime in 2015. Pat did apologize for neglecting Virtual Volumes (VVols) which was first announced 2 years ago and not really heard about since then. If you read between the lines VMware put the majority of their development effort into VSAN and put VVols on the back-burner. You can probably understand the reason for that as VSAN is a revenue generating product for VMware and a vital piece of their SDDC vision where VVols is just a new external storage architecture to replace VMFS.

More Monday

After the keynote I attended the HP session on VVols and then headed of to Chris Wolf’s session on hyper-converged infrastructure (EVO). Chris is a great speaker and it was good to find out more about what EVO was and how it would impact the partner ecosystem. They detailed the hardware configs for EVO and did some live demos of the installer process. After that it was on to the HP Blogger briefing which was a no PPT informal chat with some super techy guys and afterwards a performance by magician Andrew Mayne which was very fun to watch. In the evening I went to a dinner hosted by Infinio at Oola, it was great to see and talk with Carrie Rebar, Scott Lowe (Other), Scott Davis and a few customers. Infinio had a real nice presence at the show with a big booth and it was good to see a new start-up make a big splash. After dinner I headed over to Xangati’s party at Bourbon & Branch, a hidden Speakeasy from the old days of prohibition. I met up with Todd Scalzott there and hung out, had a few drinks and then off to the sidewalk to smoke stogies. B&B is kind of a neat place as their are no signs advertising it, passwords to get in and hidden rooms behind bookcases.

Tuesday

Tuesday was the day 2 general keynote session with Ben Fathi which is traditionally the fun one as it is more about the technology. I ended up watching it live-streamed from the hotel room which was a good quality stream. Much of the focus was on VDI (Horizion) and overall it wasn’t all that exciting like previous years as again there wasn’t a whole lot new to talk about, as a result I ended up tuning it out and not really paying attention to it. After the keynote I had to head to my speaking session which was a HP session that I was co-speaking in to highlight our VMware integration. From there I went to an EMC VVol  to see what they were doing with it, hung out in the Solutions Exchange, another blogger briefing and then off to the vExpert party with Calvin Zito. The vExpert party was fun as usual, VMware invites many of their executives and technical experts to mingle with the attendees. I appreciate the effort they put into this annual event. I ran across Pat Gelsinger at the event and got my photo with him for the 2nd year in a row. After that it was off to the Veeam party which is always epic, they outdid themselves this year with a much bigger venue with a nice outdoors space and it was crowded and a lot of fun. Thank you Veeam for not just doing it but doing it big.

Wednesday

Wednesday was a much more slow-paced and leisurely day, I hung out in the Solutions Exchange area a bit and then had to head to the airport for a flight later that evening. The official VMware parties are not all that great, I always look forward to big name entertainment at those kinds of events but VMware keeps it more low-key. As a result I usually end up heading back early instead of on Thursday morning.

Wrap-up

Overall another great event, attendance was down this year, in a previous post gave my opinion why that might be. Special thanks to Tegile for the nice vExpert swag bags and Simplivity for the coffee press. I’ll leave you with a summary of what I thought was the Good, the Bad and the Ugly at VMworld this year along with a few pics.

The Good

  • Solutions Exchange area had a lot of great things to showcase
  • Lots of great sessions
  • Awesome vendor parties
  • Great networking with people
  • Logistically it was very well executed
  • Hands-on Labs give a lot of great experience

The Bad

  • The keynotes were rather boring and didn’t have a lot of meat
  • Not many surprises, VMware didn’t really have much new to unveil
  • Things are getting a bit too spread out across Moscone and nearby hotels
  • Attendance was down this year which is bad for VMware but not necessarily for attendees

And the Ugly

  • The box lunches were truly awful this year
  • San Francisco, the costs, the walking all over and the street people, I’m tired of it
  • Product re-naming, vRealize, seriously?

And some photos

About to land at SFO…small-20140824_130148

View from the VMunderground party…

small-20140824_200835

Day 1 keynote about to start…

small-20140825_085929

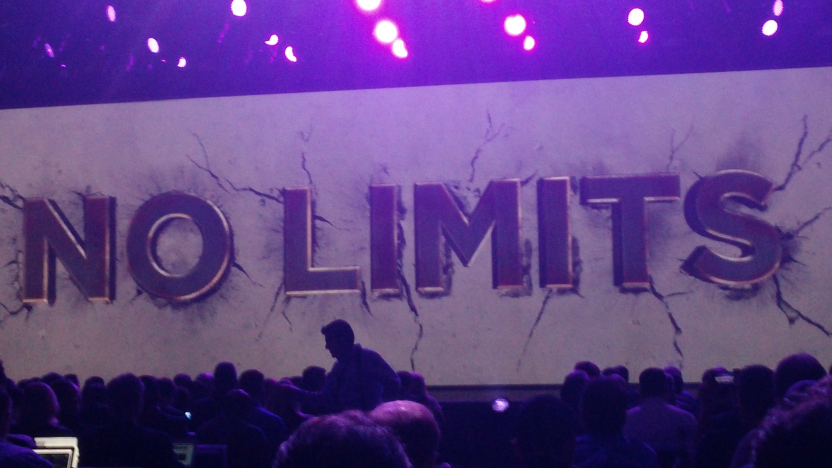
What No Limits is all about…

small-20140825_090022

Big (more like medium) announcements summed up in the day 1 keynote…

small-20140825_093042

A new family is born during the day 1 keynote and is named EVO…

small-20140825_093154

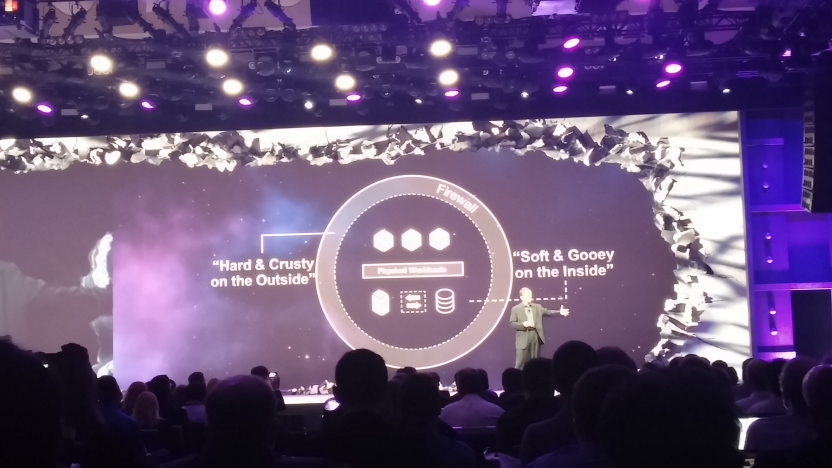
What’s a gooey egg have to do with VMware?…

small-20140825_094052

It describes most data center security implementations, hard & crusty on the outside, soft & gooey on the inside…

small-20140825_094104

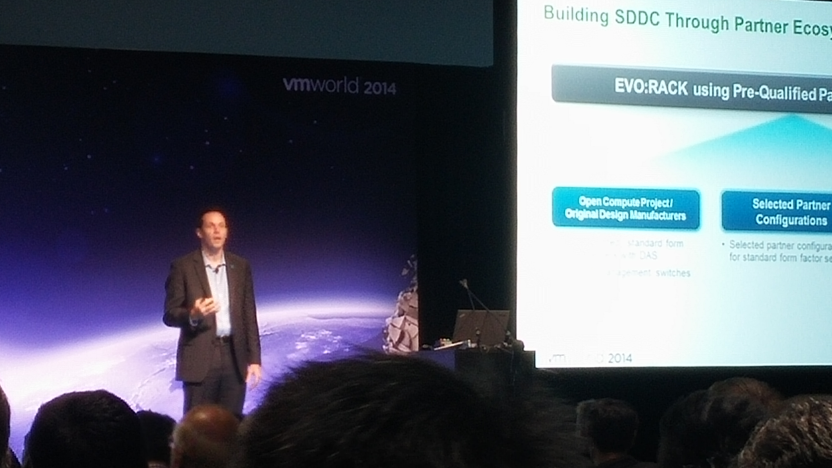
Chris Wolf, VMware’s CTO of the Americas talking up EVO…

small-20140825_143257

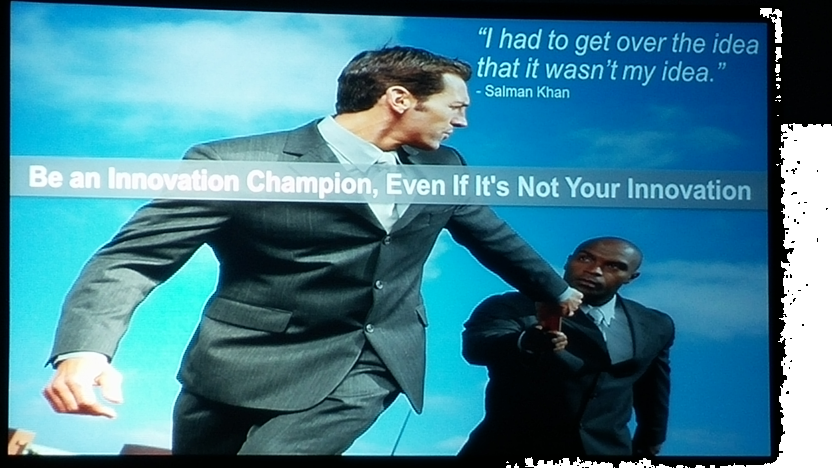
Great slide from Chris’s deck about embracing innovation even if it wasn’t your idea…

small-20140825_144145

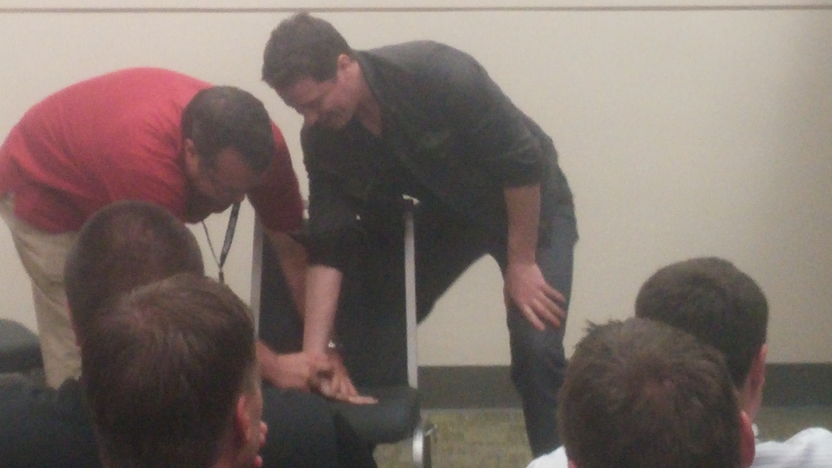
Magician Andrew Mayne performing at the HP Blogger Briefing, one of the bloggers twists his hand 360 degrees…

small-20140825_172022

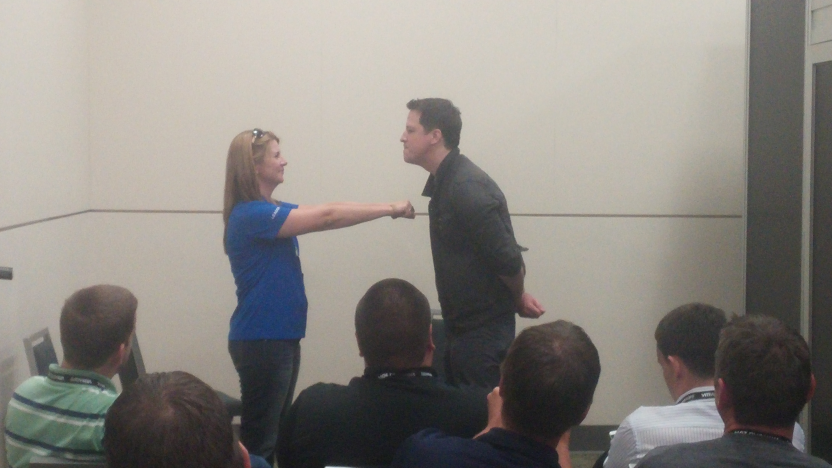
Another shot of Andrew Mayne performing…

small-20140825_172227

Andrew Mayne pulling physical objects out of a virtual rack…

small-20140826_175524

Myself with Pat Gelsinger at the vExpert party along with half of Calvin Zito and Tony Dunn photo-bombing in the back…

small-20140826_191614

What happens when an EMC’er walks into a bar, 50 shots of Jager suddenly appear…

small-20140827_004231

Trolley car performing a manual vMotion at Union Square…

small-20140827_145940

Myself with the gang from Infinio…

Image 1

Heading home…

small-20140827_210915

Share This: